C (Windows)
In this section, you will learn to run the C samples in Mech-DLK SDK with CMake and Visual Studio on a Windows operating system.
Sample List
Two categories of samples are provided: Basic and Advanced.
-
Basic: samples using single models exported from Mech-DLK to do inference of single images as well as obtain and visualize results.
-
Advanced: samples for simultaneous inference of multiple images and inference of cascaded models.
Basic
-
Classification: a sample for inference based on the Classification model.
-
DefectSegmentation: a sample for inference based on the Defect Segmentation model.
-
FastPositioning: a sample for inference based on the Fast Positioning model.
-
InstanceSegmentation: a sample for inference based on the Instance Segmentation model.
-
ObjectDetection: a sample for inference based on the Object Detection model.
-
TextDetection: a sample for inference based on the Text Detection model.
-
TextRecognition: a sample for inference based on the Text Recognition model.
-
UnsupSegmentation: a sample for inference based on the Unsupervised Segmentation model.
Advanced
-
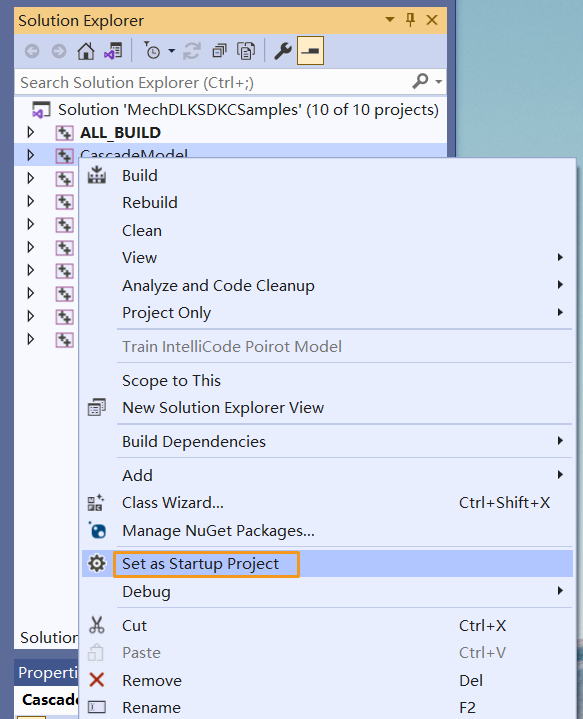
CascadeModel: a sample for inference based on cascaded models.
-
FolderImagesInfer: a sample used to show the inference of images in a folder one by one.
-
MultiImageInfer: a sample for simultaneous inference of images.
Prerequisites
The prerequisites for the use of C samples in Mech-DLK SDK are as follows:
Install Required Software
Before using the C samples in Mech-DLK SDK, you should install Mech-DLK SDK, CMake, and Visual Studio.
Install Mech-DLK SDK
Please obtain the latest Mech-DLK SDK and the third-party libraries and resources it depends upon according to the Installation Guide.
Install CMake (Version 3.2 or Above)
-
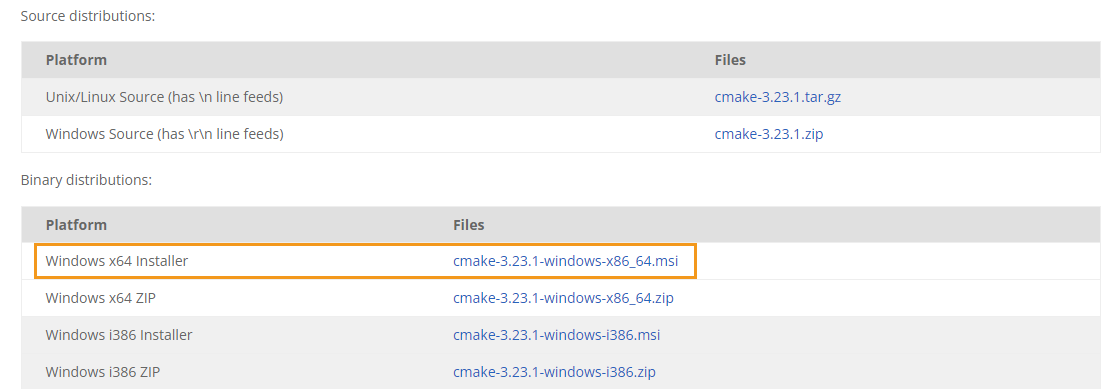
Download CMake: Select the installer to the right of Windows x64 Installer.
-
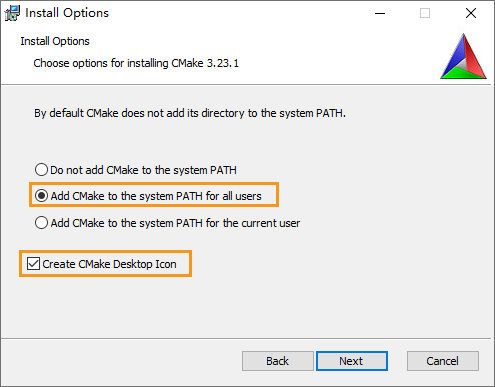
During installation, select the following two options so that CMake can be added to environment variables, and a desktop icon can be created for CMake.
Install Visual Studio (Version 2017 or Above)
-
Download the Visual Studio installer.
-
During installation, please select “Desktop development with C++” in the Desktop & Mobile category. Then, click Install in the lower-right corner.

Add Environment Variables
You can add the related environment variables by the following steps:
-
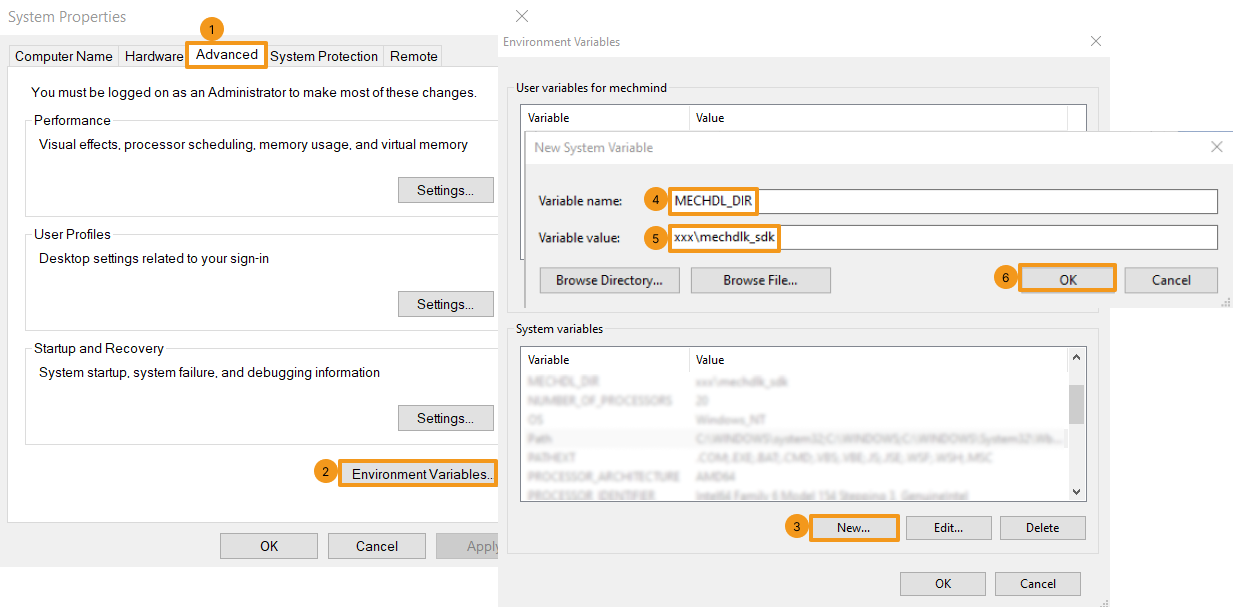
Right-click This PC on the desktop and select Properties.
-
Click Advanced system settings and on the Advanced tab of the pop-up System Properties dialog box, click Environment Variables to open the Environment Variables dialog box.
-
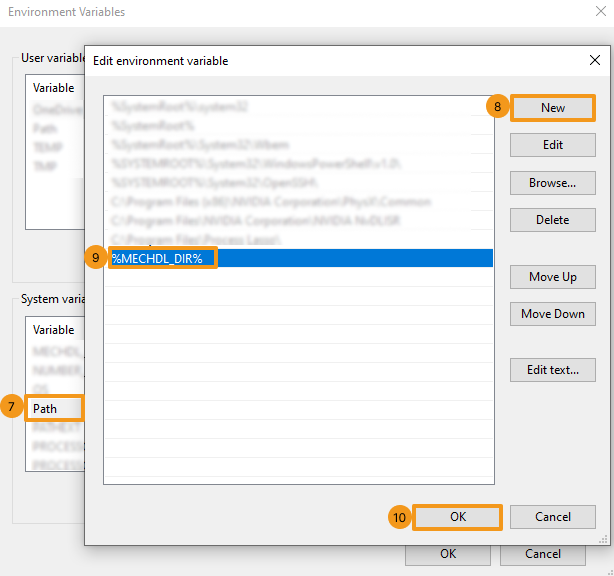
In the System Properties box, click New and in the pop-up box of New System Variable, enter MECHDL_DIR in the text field of Variable name and xxx/mechdlk_sdk in the text field of Variable value. Then, click OK.
-
In the System Properties box, scroll to Path and double-click it to show the Edit System Variable dialog box.
-
Click New in the upper-right corner, and add %MECHDL_DIR%. Then, click OK in the lower-right corner.
| If you can find %MMIND_DLK% in the Edit System Variable dialog box, select it and click Delete on the right to remove this variable. |
Build and Run Samples
You can build all samples at a time.
Configure Samples in CMake
-
Double-click the CMake desktop icon to open the software.
-
Enter or select the path to the source code and the path to build the binaries. For the path to build the binaries, you can add \build right after the path to the source code if there isn’t one and continue the configuration.
Where is the source code
xxx\mechdlk_sdk\samples\c
Where to build the binaries
xxx\mechdlk_sdk\samples\c\build
-
Click Configure. When you first click the Configure button, a window will pop up to confirm whether you want to create the build folder. Click Yes to create the folder.
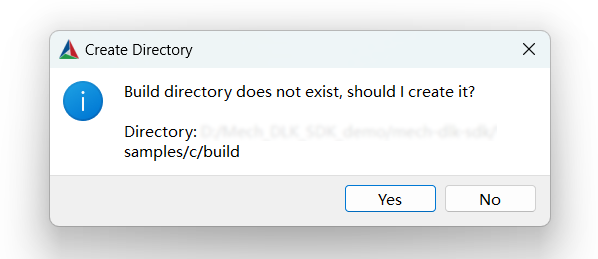
Then, you will enter the configuration window. Select the Visual Studio version and click Finish.

When the configuration completes, the statement Configuring done will appear in the last line of the log.

-
Click Generate to generate Visual Studio solutions. When the generation completes, the statement Generating done will appear in the last line of the log. Then, click Open Project to open the solutions in Visual Studio.

| You can also open the created build folder (path: xxx\mechdlk_sdk\samples\c\build), find MechDLKSDKCSamples.sln, and double-click it to open the solutions in Visual Studio. |
Build Samples in Visual Studio
-
On the Visual Studio toolbar, confirm that the solution configuration is Release. Currently, DLL files for Debug are unavailable.
-
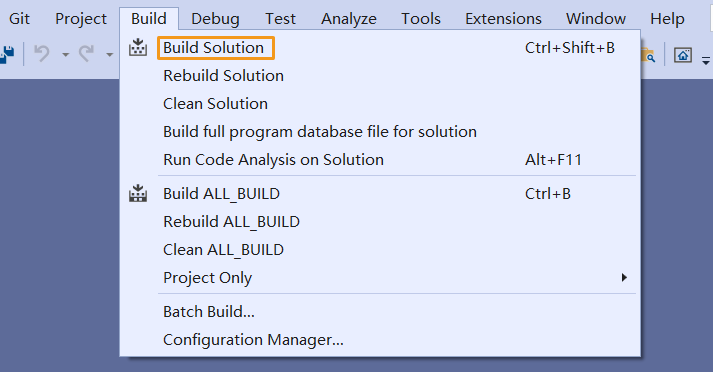
In the menu bar, select . An executable file (.exe) is generated for each sample. The executable files are saved to the Release folder, located in the Where to build the binaries path that you entered in CMake.
-
Copy and paste the resources folder to the following path:
-
xxx\mechdlk_sdk\samples\c\build\Release
-
-
Copy and paste all files in the 3rd_dll folder under the project folder to the path xxx\mechdlk_sdk\samples\c\build\Release.
Ensure that only the files in the 3rd_dll folder are copied and pasted to the destination path, not the folder itself. -
Copy and paste all files in the mechdlk_sdk\dll folder under the project folder to the path xxx\mechdlk_sdk\samples\c\build\Release.
Ensure that only the files in the mechdlk_sdk\dll folder are copied and pasted to the destination path, not the folder itself.
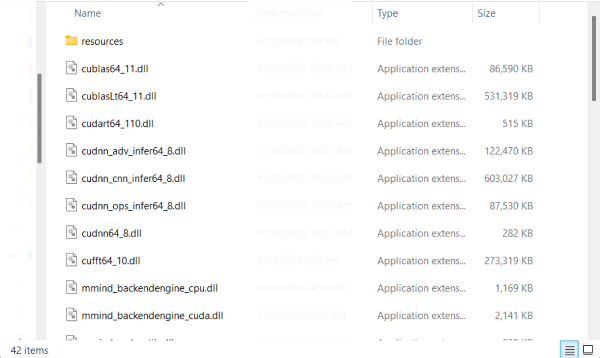
After you complete the copy, the destination folder should contain the following types of files (the filenames may vary):
Run Samples
You can run the samples in Visual Studio after building them, or you can run the samples by double-clicking the executable files.
