Test Static Repeatability
This document describes how to test the static repeatability.
|
In static repeatability testing, the part is fixed in place using a fixture. The robot, equipped with a camera, moves to the measurement position of the part’s feature. At this position, the robot remains still while the camera captures multiple images of the feature. For example, if a part has 5 features, the static repeatability testing is performed as follows:
|
|
You can first perform a semi-dynamic repeatability test. For features with poor repeatability results, you can then conduct a static repeatability test. In this case, the static repeatability test only needs to be performed on specific features, making the process more efficient and convenient. |
|
What is a robot side?
|
Prerequisites
Before starting the static repeatability test, please ensure the following conditions are met:
-
The current part is associated with the Mech-Vision measurement plan in Mech-Metrics.
-
The current feature is associated with the Mech-Vision measurement project in Mech-Metrics.
-
The Mech-Vision measurement plan and measurement project are open in Mech-Vision.
-
The robot is connected to Mech-Vision by using the Standard Interface communication. Hand-eye calibration is complete, and all measurement positions have been taught in the robot program. The robot has been moved to the first measurement position.
-
The robot and camera have been preheated for 30 minutes before starting the measurement.
-
External lighting and temperature are stable before starting the measurement.
Factors Affecting Static Repeatability
-
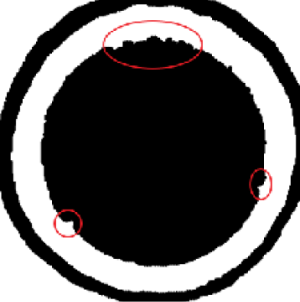
Burrs on the part edge

-
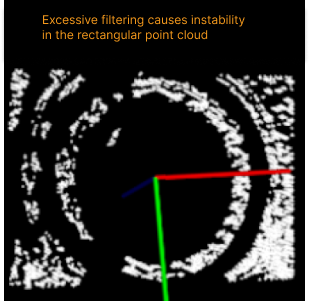
Improper filtering parameter settings

-
Improper exposure parameter settings

-
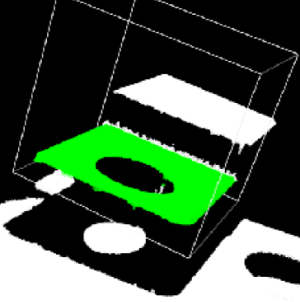
Improper ROI settings

Test Static Repeatability
Follow these steps to test static repeatability:
-
In the Configuration interface of Mech-Metrics, go to the Analysis and Compensation tab and click Static Repeatability.
-
On the Static Repeatability Testing page, select the feature to be tested, ensure the robot has moved to the feature position, set the repeat times to 20, and then click Start testing.
-
The recommended repeat times are between 20 and 50.
-
-
After the testing is complete, view the test results for the feature on the right side of this page.
-
If an error occurs, follow the prompts provided by the software to troubleshoot.
-
The 3D tab on the test results page shows the change trend of the 3D coordinates of the feature points with the number of measurements.
-
A feature point refers to the point at the location of the feature. For example, for a circular feature, the feature point is the center of the circle.
-
3D coordinates refer to the coordinates of a point in a three-dimensional reference frame.
-
In the 3D tab, 3D refers to the 3D distance between the feature point location measured each time and the feature point location measured during the first measurement.
-
-
You can select one or more features in the 3D tab and then view and compare the change trends of the distance with the number of measurements.
-
-
Repeat the above steps to perform the static repeatability testing on the remaining features and view the test results.
-
In this software, the default static pass threshold is a repeatability range (R) ≤ 0.05mm. If the project has different pass threshold requirements, you can contact technical support for modifications.
-
Accuracy refers to the closeness or error size between the measurement results and the true value.
-
Range is a statistical indicator that measures the difference between the maximum and minimum values in a data set. It is used to represent the dispersion of the data.
-