User Interface
File
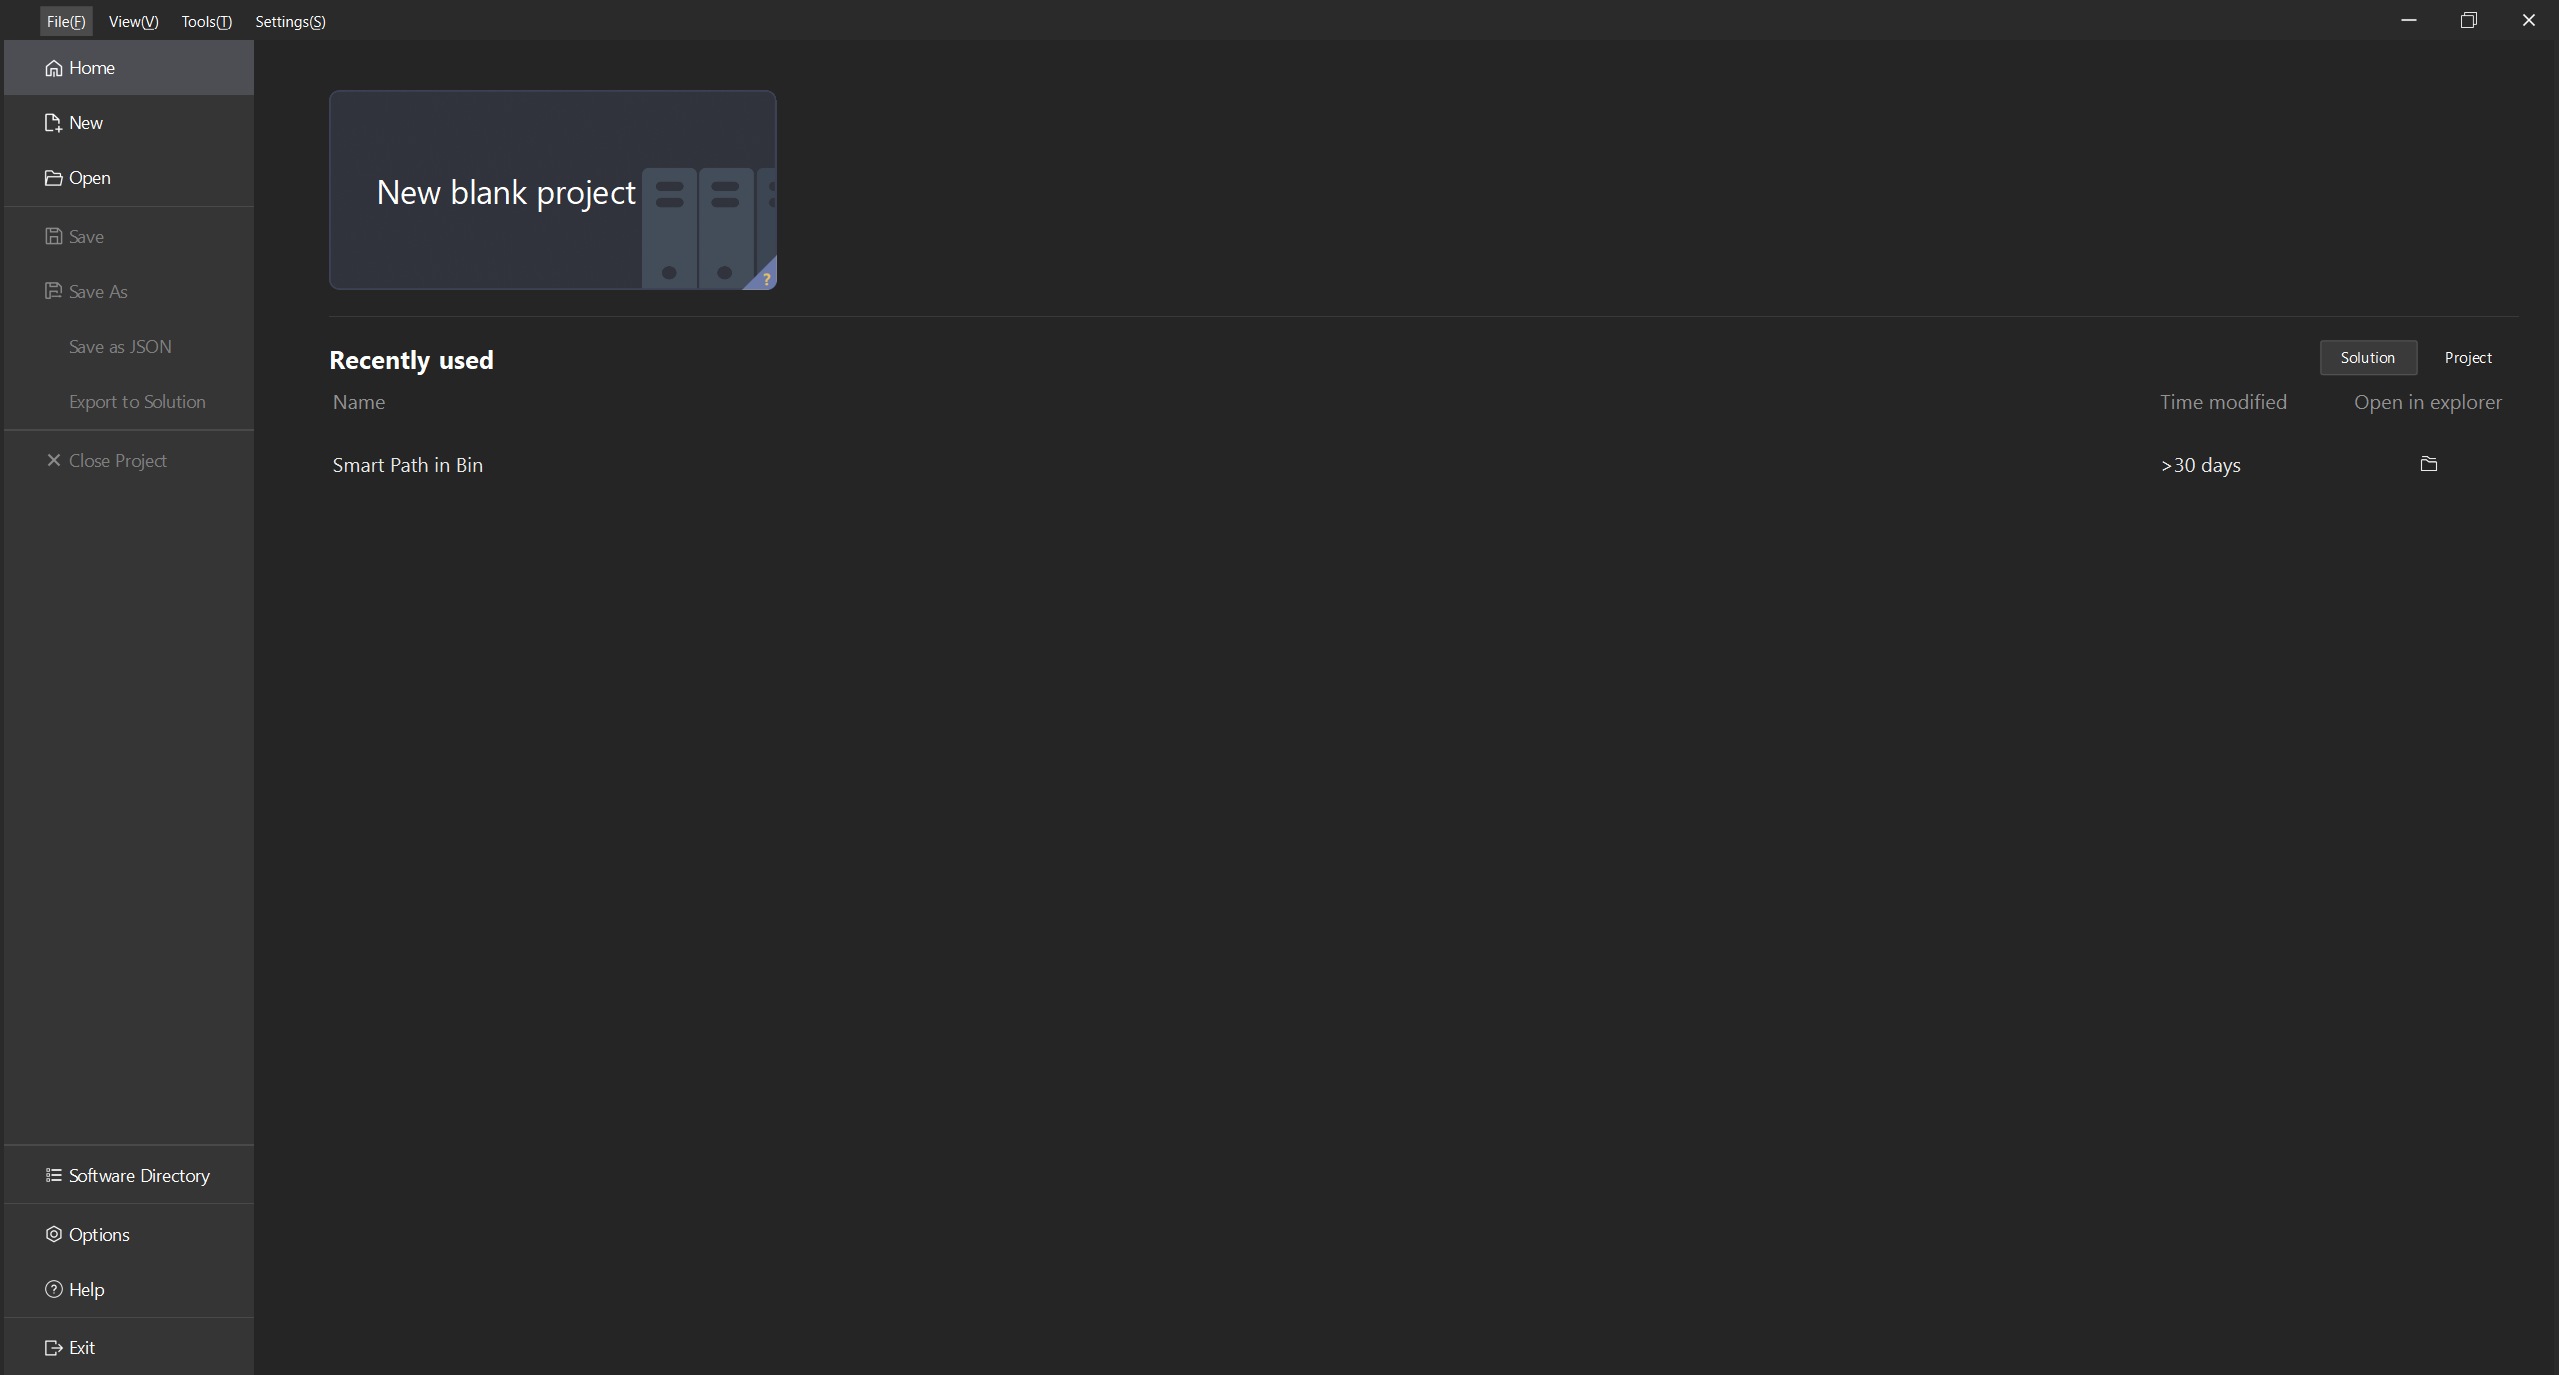
After Mech-Viz is open, the File page is displayed.

This interface consists of the following parts:
Option |
Description |
Shortcut |
|
Home |
Create a new blank project. |
Ctrl + N |
|
Recently used |
Open a recently used project. |
None |
|
New |
Create a new blank project. |
Ctrl + N |
|
Example projects |
Built-in example projects. Please refer to Example Projects for how to use them. |
None |
|
Open |
Select a project folder and open it. |
Ctrl + O |
|
Save |
Save changes to the current project. |
Ctrl + S |
|
Save As |
Save the project under a specified directory. |
Ctrl + Shift + S |
|
Save as JSON |
Save the project, and save the VIZ file in the project folder as a JSON file. |
None |
|
Export to Solution |
Export the current project to a solution. For more information, please refer to Project and Solution. |
None |
|
Close Solution |
Close the current solution. |
Ctrl + W |
|
Software Directory |
Open the folder where the software is located. |
None |
|
Options |
Open the Options window. |
None |
|
Help |
View the software support, version information, release note, and user manual. |
None |
|
Exit |
Close Mech-Viz. |
Ctrl + Q |
|
|
Home Software Interface
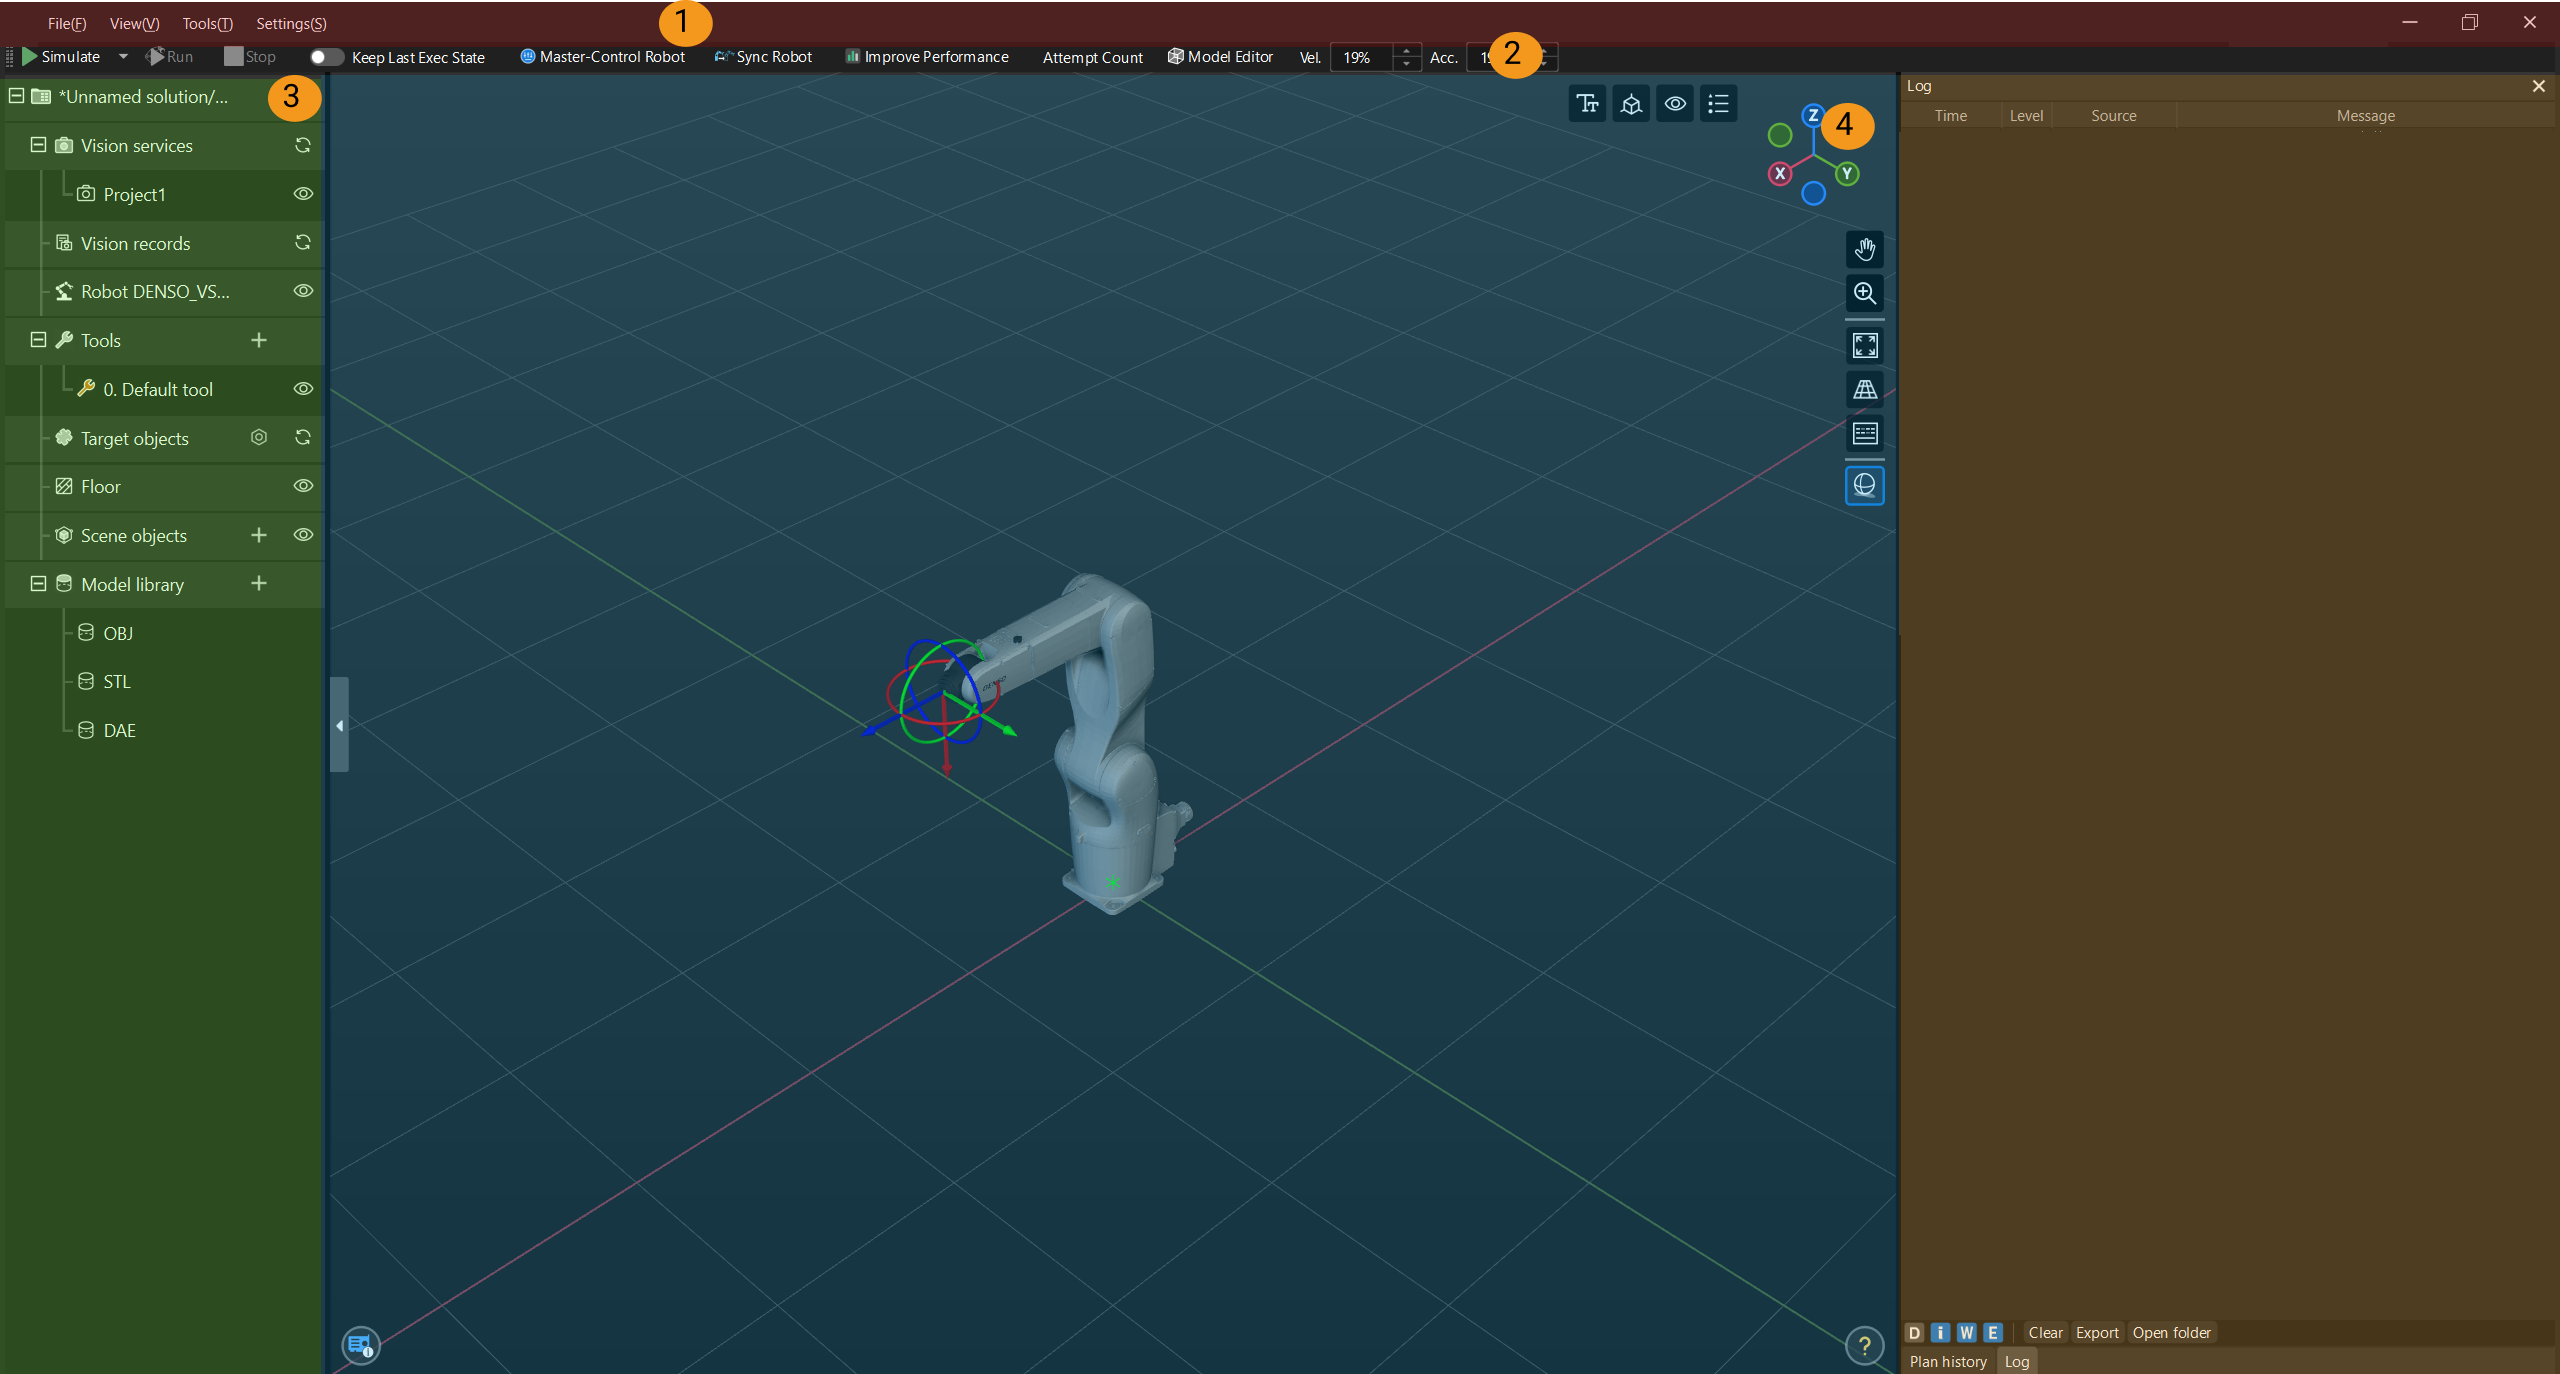
After creating a new blank project, select a robot model in the pop-up “Robot Model Library” window, and then enter the home software interface.

The main interface consists of 5 main sections, as listed in the table below.
1 |
Menu Bar |
Includes File, View, Tools, Settings.
|
2 |
Toolbar |
Used to simulate the project, control the real robot, adjust the robot speed, and so on.
|
3 |
Project Resource Tree |
Used to manage the resources in the project, including tools, target objects, scene objects, etc.
|
4 |
3D Simulation Area |
The area where the robot motion path, collision detection result, vision pose, point cloud, etc. are displayed when the project is running or simulating.
|
5 |
Functional Panels |
Include Workflow, Robot, Collisions, Plan history, Others, and Log.
|